Tuesday, March 13, 2007

Success!

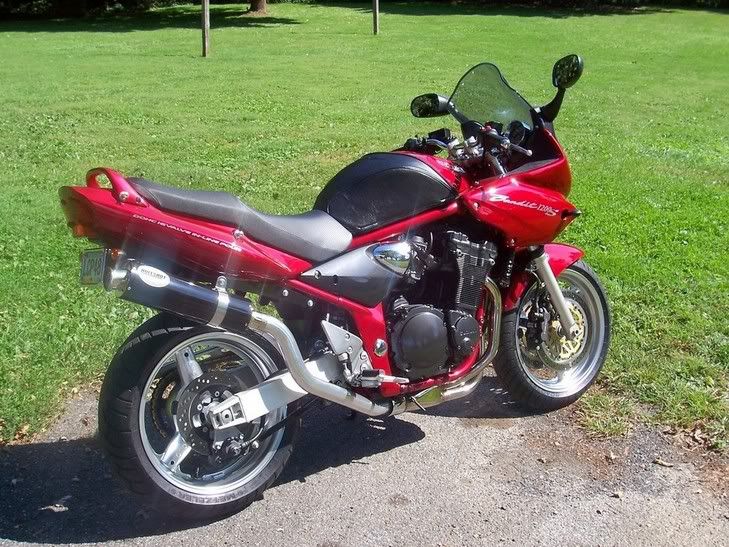
After a little touch-up here and there, they are finally DONE! I must say that I really like the look especially after the rotors were mounted back up on the wheels.

The chain needed some attention in a bad way. I tried out my spiffy new cleaning contraption and it did pretty well. The main thing is that it cuts down on the mess when you use kerosene because that stuff just goes everywhere. After cleaning, the chain was adjusted for slack too.

It was Sunday afternoon and the weather was still pretty decent - I couldn't let this day go to waste! I could tell the bike wasn't happy about starting...afterall, it had been several months. Once the gas worked it's way through the carbs it roared to life.

I got all my gear on and the sensation was just great. The first ride of the year is always one of the best. When you're stuck in a cage all winter you forget just how much power a motorcycle has on tap.

It was a little too cold to take the bike to work on Monday, but when I got home it was around 60 degrees... knowing that it was going to fall back into the 30s in the second half of the week, I wasn't about to let any riding opportunity slip by. I had to drop the water bill off, which is only about a 2 minute drive... but that soon turned into a 20 minute ride. I would have stayed out longer, but rush hour traffic becomes a problem and it's just no fun being in traffic unless you have to.

Today is a good day. The temp hardly dropped overnight so this morning it was already in the 50s... that means I'm taking it to work. I forgot how long it takes to get suited up and to make sure I have everything together. The real fun is the ride home - it should be in the upper 60s by that time. Good stuff.

Sadly this will be the last ride for probably a week or two as the temps are supposed to drop...argh. Oh well - plenty of warm days ahead, just not soon enough.

Saturday, March 10, 2007

Making progress


Looking good if I must say... looks a lot like an aftermarket rotor which is what I was kind of after. Hopefully I'll get the wheel back on the bike tomorrow.

Congrats to Razor for having a successful maiden voyage aboard his new bike! I know you think it's fast now, but jus wait until you crack open the throttle in 3rd gear at about 6 grand....

Friday, March 09, 2007

It's all in the details


What you see here are the bolts that hold the brake rotors on the wheels. After carefully masking and painting the carriers and cleaning off the wheels, I couldn't just put the bolts back as-is. A quick minute or two on the buffing wheel and the bolts on the left will look just like the ones on the right. I was hoping to just clean them up and had no idea they'd polish out this well.

A couple of more coats of paint on the rotor carriers and they'll be about ready. With the wheel off the bike and the rotors off the wheels, I'm reconsidering the task to paint the wheels too....hmmmm.. decisions decisions.

Not sure if I should do the wheels like this bike or something more of a gunmetal. Those wheels were painted with a rattle can believe it or not.. I might have to take a trip to the hardware store to see what colors they have.

Tuesday, March 06, 2007

Project started (finally)

Winter has been stubborn about going away, it was barely 30 degrees today and snow still covers everything except the streets. I figure I might as well do something to the bike for the season. As mentioned in the previous post I want to get rid of the gold coloring on the rotors. After getting the front wheel in the air, the calipers were detatched and the axle was removed.

The wheel should slide right out - right? Wrong.. I didn't have the front end up in the air enough for it to clear the fender...doh. As it stands, the bike is super stable on the center stand and jack stands. I don't want to risk the bike falling over by having it only on the back wheel and jack stands. After removing four screws the fender was free and came out along with the tire. It's been a while since I cleaned under there anyway....

I've never taken a rotor off before and after really leaning into the six bolts they broke free. To ensure these bolts never come out unintentionally, the factory really loads them up with lock-tite on the threads. Here's a picture of the rotor right after removing it from the wheel - as you can see it needs a little TLC.


After about 10 minutes with some degreaser I got most of the junk off them - they actually don't look too bad when they're clean. After I was about done, I realized I could have blasted all of it off with some brake parts cleaner.. oh well. That stuff is a bit nasty in a non-ventilated garage and really dries out your skin. Here's the result of a little elbow grease:

That's it for now - hopefully I'll be able to get some paint on these suckers soon. Of course I have to clean the other rotor too.

Thursday, March 01, 2007

Winter almost behind us (I hope!)

Ahh - March 1st. I woke up to some serious thunderstorms and it was great...anything to help get rid of the snow! Now that the temperatures aren't in the sub-zero range, my motivation has increased to the point that I want to do some work on the bike. Not work in the sense that it needs work done, but more along the lines of some improvements, both cosmetic and functional.

First thing I want to do is paint the rotor carriers black. They currently are gold in color and I'm not a big fan of that. I'm going for the silver/black look on the bike and it's just one of those things that sticks out. I originally wanted to get them powdercoated, but lets just say that the budget wasn't approved. I only considered painting them after I was told it works pretty well as long as I use the right type of paint. The biggest pain will be masking off the rotors from the carriers, as they do not separate from each other. What the F is a rotor carrier? It's the gold thing in this photo:

I also got this spiffy automatic chain oiler called a Scottoiler. This device has a reservoir of oil that is mounted on the bike. It is then connected to a vacuum line on one of the carbs and pumps oil, one drop at a time onto the chain near the back sprocket. It's not difficult to setup, but will require some thought for a clean, and hopefully mostly hidden, install. Photos of progress will be posted after I start working on these......